Well built CMS-based sites, such as the ones we produce for clients, have a friendly visual editor to make content formatting easy for content contributors. Most of the time, a content contributor doesn't need to know any HTML at all, and can treat their work in their website as if they were using any document writing program such as Word or Pages. On occasion, however, content editors might want to troubleshoot formatting or gain a little more control. When this happens, there are a handful of simple HTML tags that will help content editors. This post serves as a guide that you can return to any time you need a little extra formatting-fu.
HTML stands for HyperText Markup Language. It uses predefined elements, or tags, to tell the web browser (e.g. Firefox, Chrome, Safari, IE) how to render the page. If your CMS offers a visual editor -- buttons that you click to apply formatting such as bold, italic or list styling to your text -- then the visual editor is simply writing HTML tags around your selected text.
For example, you might write and use your visual editor to format something that looks like this:
The big green cat had been playing in the compost.If you were to disable your visual editor, the text above would actually look like this:
<p>The big <strong>green</strong> cat had been playing in the <em>compost</em>.</p><p></p>, <strong></strong> and <em></em> and using it to determine how text should display.
In addition to controlling formatting, this information is also semantic, and provides useful information about the content to screen readers and search engines. For more on semantic markup -- as well as how to choose when to use which tags -- check out my earlier post, 5 Tips for Writing for the Web.
Writing HTML
As a general rule, HTML elements begin and end. This means that there is a point at which the formatting you want to apply (e.g. bold) starts, and a point at which it ends. Without this, the browser doesn't know what text should be bold, and what shouldn't. The wrapping rule will typically look like this:<tag>Content that is impacted by the tag</tag></tag>, represents the end of the formatting instruction.
A couple of elements are single instance. Rather than start and end, they simply happen at one point. For basic HTML, you will likely only see this with two tags: <img /> and <br />. These mean "image" and "break" (as in a single line return in Word or Pages). Note that there is a / before the final greater than symbol, marking closure of the tag within the tag itself.
Paragraphs, divisions and breaks (aka "line returns")
Paragraphs
Paragraphs are wrapped with the<p> tag. Only elements that are actually paragraphs should be wrapped with this tag because it has semantic meaning.
An example of how this might be written:
<p>First paragraph. Imagine it is a few lines long.</p>
<p>Second paragraph. Imagine it is a few lines long.</p>
Div (division)
Another tag,<div>, can be used to group together a block of items. Many paragraphs can be inside of a single div. Likewise, a div can be placed inside of a paragraph, or within another div.
Example:
<div><p>First paragraph. Imagine it is a few lines long.</p>
<p>Second paragraph. Imagine it is a few lines long.</p></div>
Break (line return)
Think of this akin to hitting the return key once in whatever word processing application you use. It creates a single line return, but does not start a new paragraph. The code is simply:<br />
<p>An address, line one<br />

An address, line two</p>
Note: the <br /> is not needed after tags that already separate content out into their own blocks. For example, you do not need a <br /> tag after a paragraph, header, list or list item end, since those elements already default to new lines with space before them.
Headers
As discussed in 5 Tips for Writing for the Web, headers are very important for site usability and proper semantic markup. Headers usually go from the most important (and largest) on the page,<h1> to less important (and much smaller), <h6>. Header level 1 (<h1>) should only be used once on a page; it should be used for the page title only.
Header tags wrap their elements fully, like paragraph tags, because headers begin and end.
Examples:
<h2>This is a header level 2, like the word "Headers" above</h2><h3>This is a header level 3, like the words "Break (line return)" above</h3>Text styling, bold and italic
Bold and italic are text styles, and HTML is aiming to be more semantic in its markup. There are two old tags, not included here, that explicitly mean "bold" or "italic." Rather than using those tags, the tags you should use instead mean "strong" --<strong> -- (which typically renders as bold) and "emphasis" -- <em> -- (which typically renders as italic).
Examples:
The mischievous cat was named Loki.would be written as
The <strong>mischievous cat</strong> was named <em>Loki</em>.Lists
Lists are also discussed extensively in 5 Tips for Writing for the Web, as they are great tool for making your text easy to read. There are two basic types of lists: ordered lists (<ol>), which uses numbers or letters to order list items, and unordered lists (<ul>), which simply uses bullets.
Lists are made up of list items (<li>) which is each bullet point in the list.
Examples:
would be written as
- numbered list item 1
- numbered list item 2
<ol>

<li>numbered list item 1</li>

<li>numbered list item 2</li>

</ol>
and
would be written as
- unordered list item 1
- unordered list item 2
<ul>

<li>unordered list item 1</li>

<li>unordered list item 2</li>

</ul>
Entities and unusual characters
Sometimes special characters or markup need to be included in your copy. Examples of the characters, or symbols, you might need include:- Copyright: ©
- Registered: ®
- An extra blank space (or many in a row)
- Copyright: ©
- Registered: ®
- An extra blank space (or many in a row):
If you want the entity to appear smaller and slightly higher than your text like a trademark symbolTM, then you can wrap it with the <sup> tag.
Example:
Example TrademarkTMwould be written as
Example Trademark<sup>TM</sup>
A full guide to character entities can be found here:
http://dev.w3.org/html5/html-author/charref
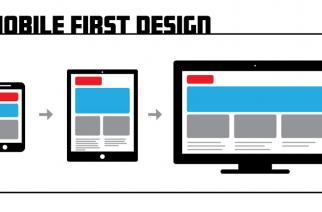
Note: resist the urge to use many entities in row in order to force indentation in your content. This will become extremely messy with responsive design, where the page reshapes to fit the user's device. If you need indentation options and styles, request them from your developer.
Anchor tags, for linking things
Anchor tags (<a>) are used to link text to something else, such as another website, another page on your site, a phone number or an email address. These tags are more complex because they require instructions within the tag itself. If I just wrapped text with the <a></a> tag, it would appear as a link but wouldn't actually know what to do when the user clicked on it. The key value that any anchor tag needs is itshref value, which stands for hypertext reference and tells the browser where to direct the click.
A link might be written like this:
<a href="/path/to/destination">the text or image that is clickable</a>
If you want the link to open in a new window, you can add more attributes to the tag, in this case, target="_blank":
<a href="/path/to/destination" target="_blank">the text or image that is clickable and takes the user to a new window</a>
If your destination is a phone number, and you want it to be clickable on a mobile device, simply include tel: before the destination in the href tag:
<a href="tel:1234567890">the text or image that can be clicked to dial a number</a>
If your destination is an email address, simply include mailto: before the destination in the href tag:
<a href="mailto:email@address.com">the text or image that can be clicked to start an email</a>
Images
Images are also more complex tags (<img>) because they require information about the location of the image file (src="path/to/destination"), and sometimes information about how the image should be displayed. They are also single instance tags, and so they open and close in one complete tag.
For example:
<img src="/path/to/file" />
Note that the file must exist somewhere on the internet in order for the browser to render it for your site visitors. This can be on your server, or elsewhere such as instagram or flickr.
There are additional attributes that you may want to give to images, but most of those should be left to your stylesheets and not handled in content editing, so they are not included here.
One attribute that should never be omitted is the alt="useful description of the image" attribute. Alt text is essential for screen readers, providing the non-sighted user with the content that they would have gotten if they had been able to see the image itself. Keep in mind that non-sighted users includes humans who have every right to equal access to your content, and search engines (such as Google) that index your site for inclusion in search results.
An example of proper use of alt text:
<img src="/path/to/file" alt="useful description of the image" />
Useful description of the image is very important. Your alt text needs to be thought out in the same way that you put time and consideration into your content or into the image creation. Remember that for some, the alt text is their experience of your content. For example, if your image provides information about an event, such as location and time, the alt text should not be "event flyer" as that is not helpful in any way. Rather, it should be something like "Finger painting class, Mondays at 10am, Monarch room."